Tutorial 04
hfVisualizer Basics
Goal
This tutorial covers the core concepts you need before using hfVisualizer remote control in practice.
It focuses on the current implementation of:
- remote target selection
currentViewandactiveRenderViewviewId-based view control- display/camera commands and
--view-id
1. Set the remote target first
If only one instance is running, you can send commands without --target.
If you repeatedly work with one instance among several, set the default target first.
hfVisualizer --remote list
hfVisualizer --remote target set 8f6d1c2b
hfVisualizer --remote status
hfVisualizer --remote focus
Key rules:
--target <id>is a one-shot overridetarget set <id>stores the local default targettarget clearremoves the stored default target
2. Open and save files
hfVisualizer --remote open D:\Work\frame.h5.hdb
hfVisualizer --remote save
hfVisualizer --remote write-scene D:\Work\frame.png
A useful starter flow is:
opencamera fitrepresentation bothwrite-scene
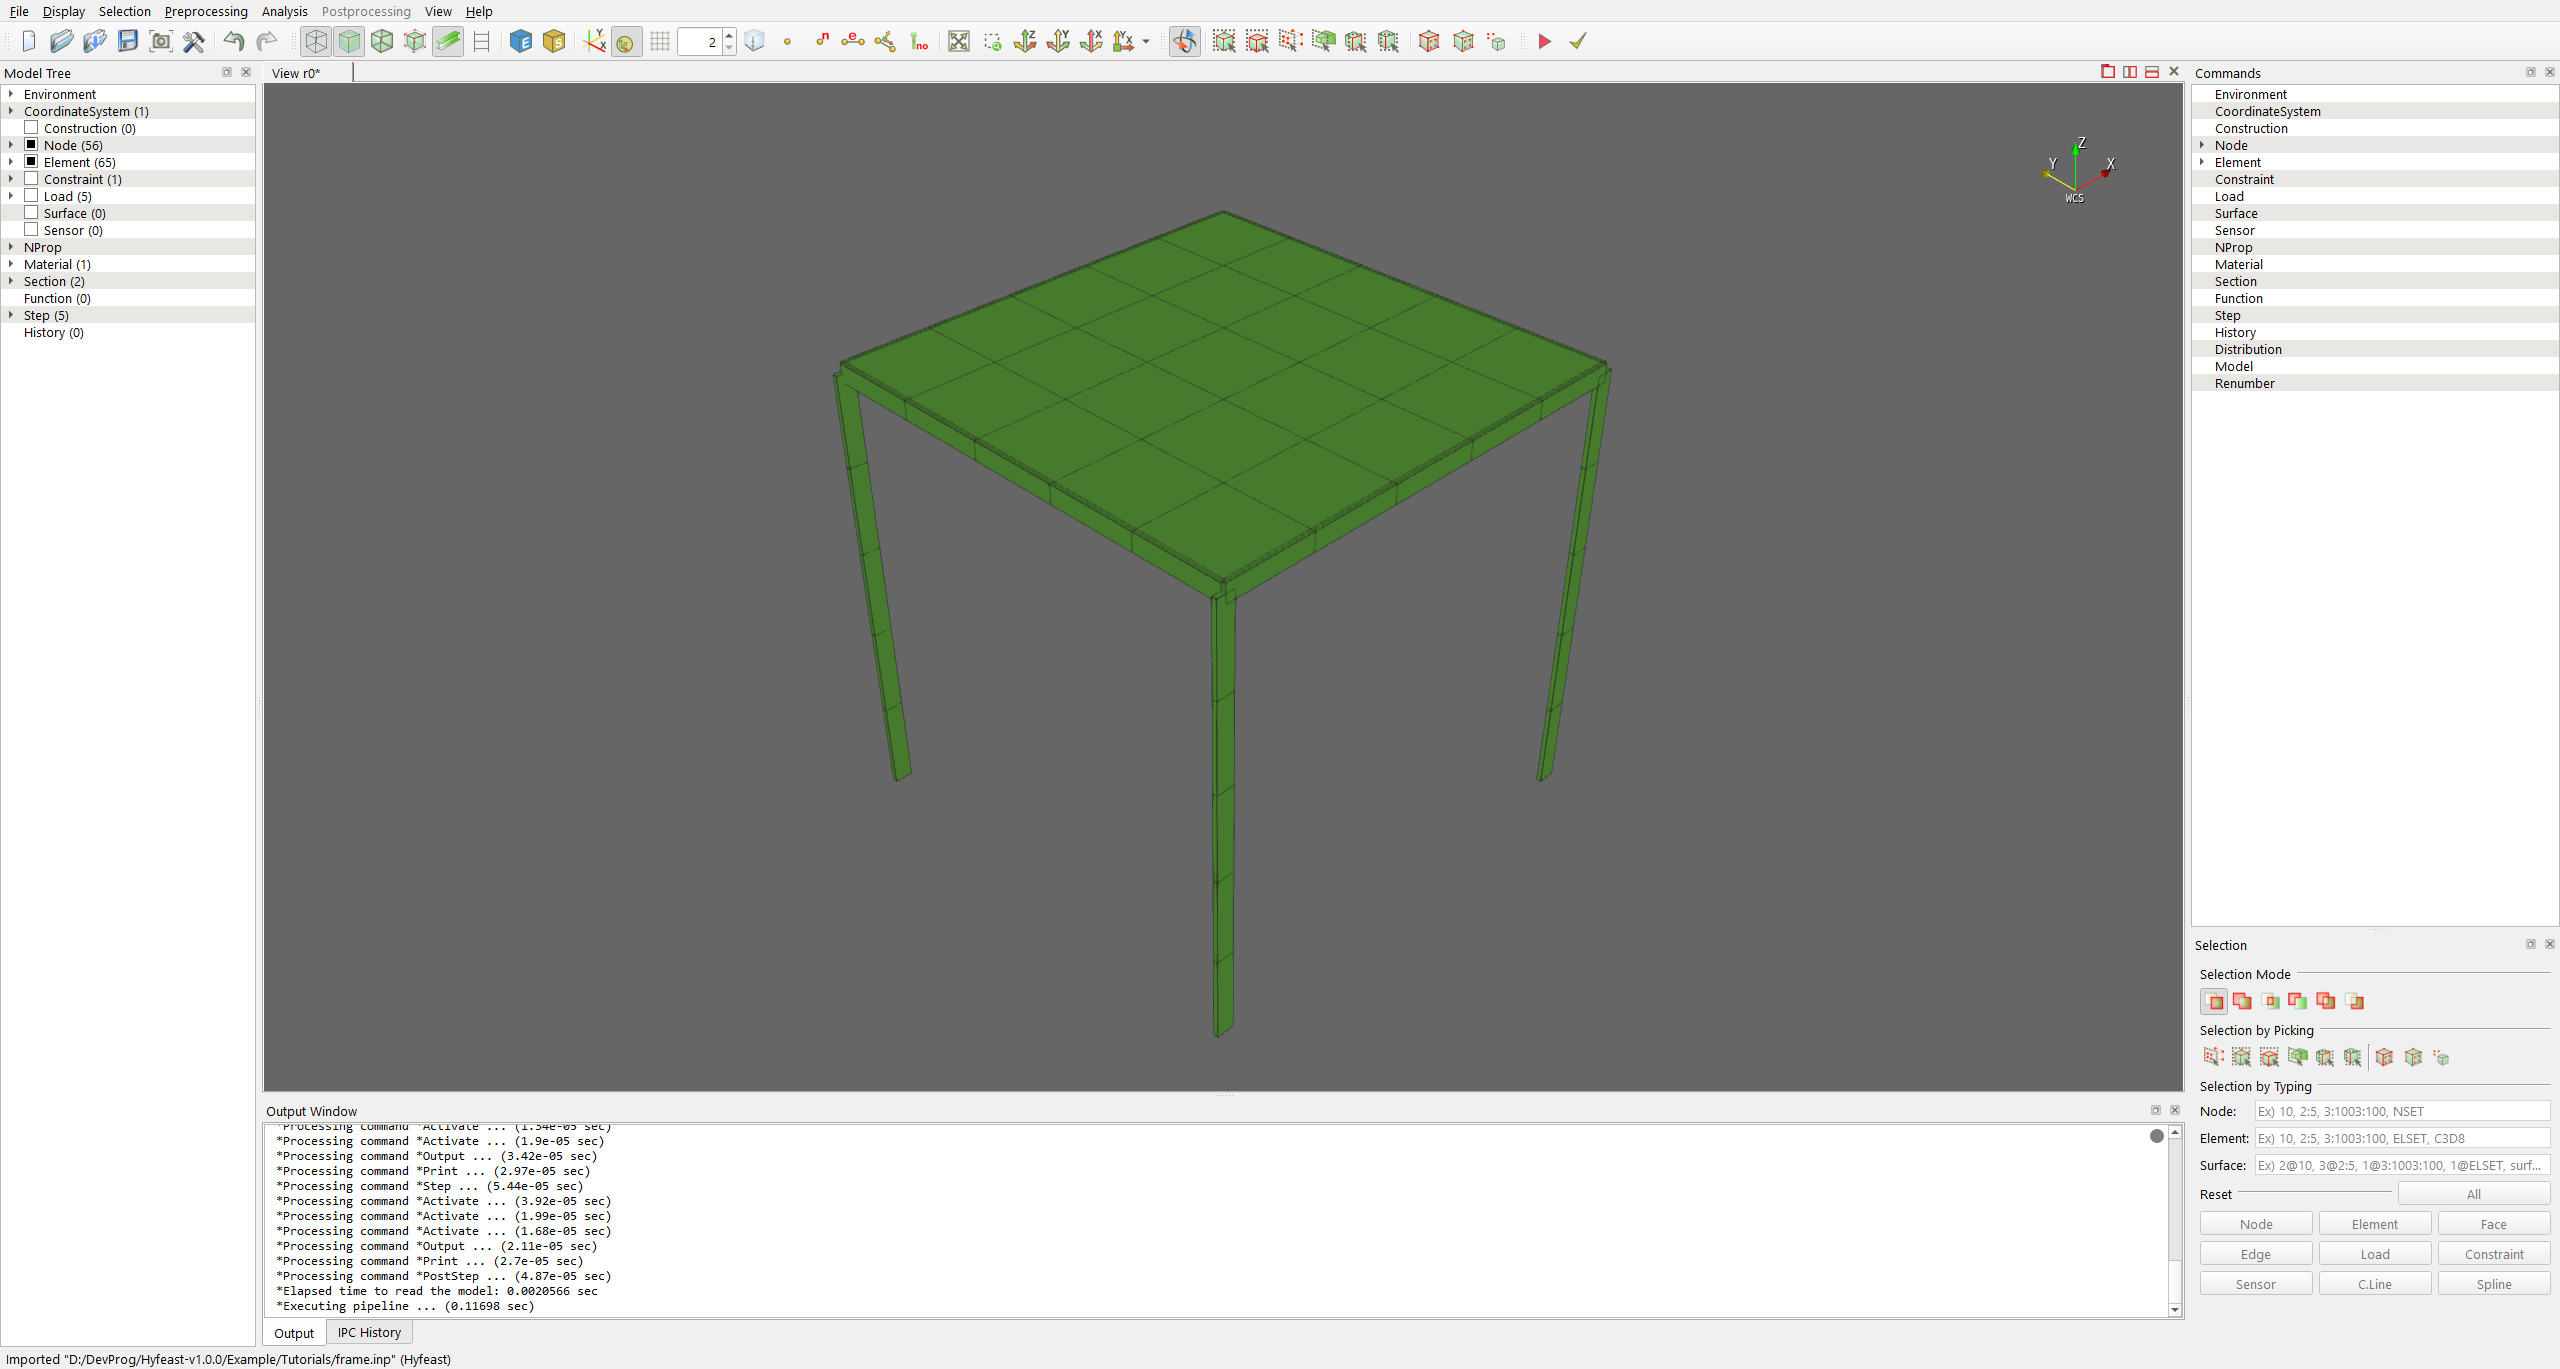
The following program shot shows the tutorial frame.inp model after import, camera fit, representation both, and display-control grid off.
3. Views now use --id
view commands now work with viewId, not the old position-based index.
hfVisualizer --remote view list
hfVisualizer --remote view add render
hfVisualizer --remote view activate --id r1
hfVisualizer --remote view close --id c0
Typical viewId patterns:
- render view:
r0,r1 - node table:
n0 - element table:
e0 - chart:
c0
4. currentView and activeRenderView can differ
The selected central view is the currentView.
The default target for display, camera, and visibility commands is the activeRenderView.
For example:
- the current central tab may be a
chart - but the active render target may still be
r1
That is why view list must be read with both concepts in mind.
5. Display and camera commands target activeRenderView by default
hfVisualizer --remote representation both
hfVisualizer --remote transparency on
hfVisualizer --remote display-control grid off
hfVisualizer --remote camera fit
These commands apply to the current activeRenderView unless you override the target.
6. Use --view-id to target another render view directly
You do not have to change the active render view just to adjust another one.
hfVisualizer --remote --view-id r0 camera view +z
hfVisualizer --remote --view-id r1 camera view +z
hfVisualizer --remote --view-id r1 display-control grid off
hfVisualizer --remote --view-id r1 visibility element all on
Benefits:
- no change to
currentView - no temporary active-view switch
- easier side-by-side comparison across render views
7. Recommended startup checklist
When you open a new model, this sequence is stable:
statusview listcamera fitrepresentation both- if needed,
display-control grid off - save the scene with
write-scene
Related documents
Next step
- Continue with Tutorial 05 - Selection and Visibility